TreeGIS allows for the simple, easy display of i-Tree™ (or any tree-based) inventory data in 3D.
The following tutorial shows how to display i-Tree™ ECO database trees in 3D and how to quickly change the display parameters for different modeling and management scenarios. (Keep in mind that these settings only need to be made once and can be saved to the project file.)
(1) Point TreeGIS to the location of an i-Tree™ ECO database using the Map/Settings dialog as shown below.
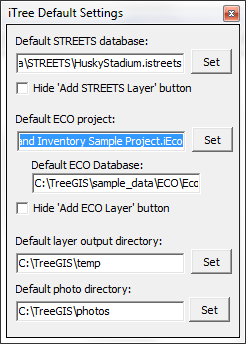 |
| The TreeGIS Settings dialog. |
(2) Add a DEM layer, a DOQ layer, and any other ancillary layers using the Add Layer button as shown below.
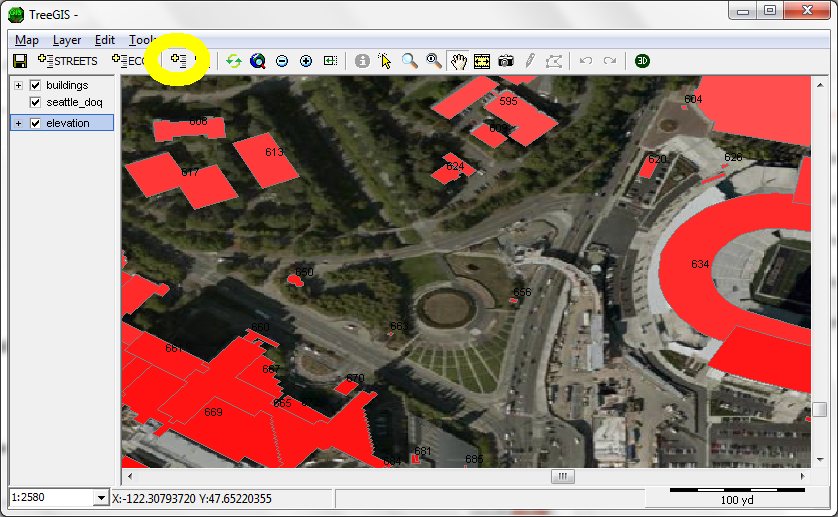 |
| Add layers to the view using the Add Layer button (circled in yellow). |
(3) Open the Layer Properties dialog for the DEM layer, by double-clicking it in the Legend, and click on 'Treat Layer as Elevation Model (DEM)' on the
3D tab (as shown below).
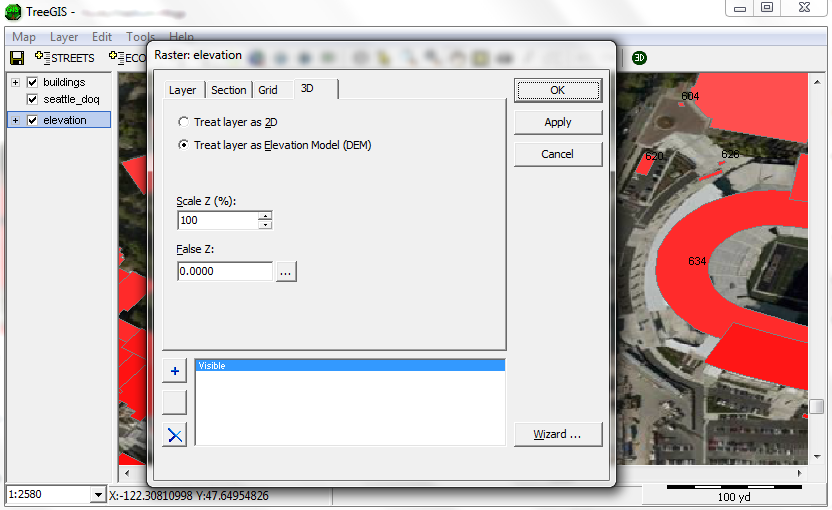 |
| Click on 'Treat layer as Elevation Model' to use a raster layer as a DEM for the 3D model. |
(4) Click on the Add ECO Inventory Layer button to add the ECO tree inventory layer to the view as shown below.
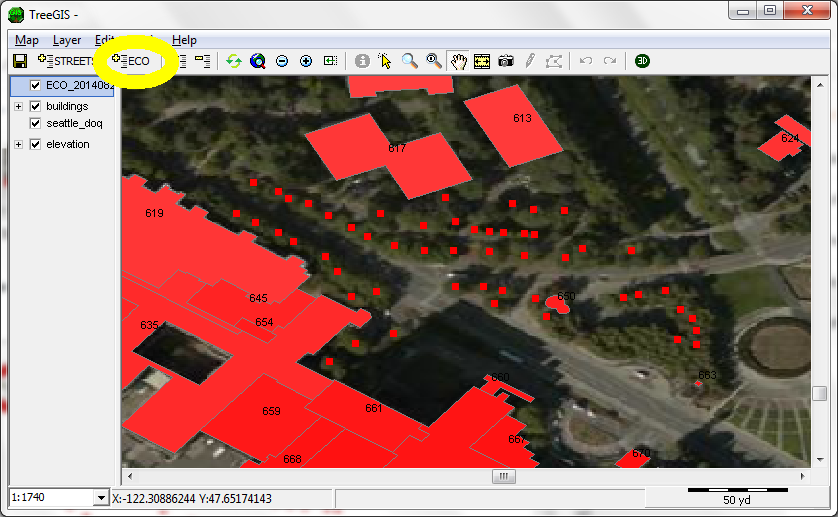 |
| Add the ECO inventory layer to the view using the button circled in yellow. |
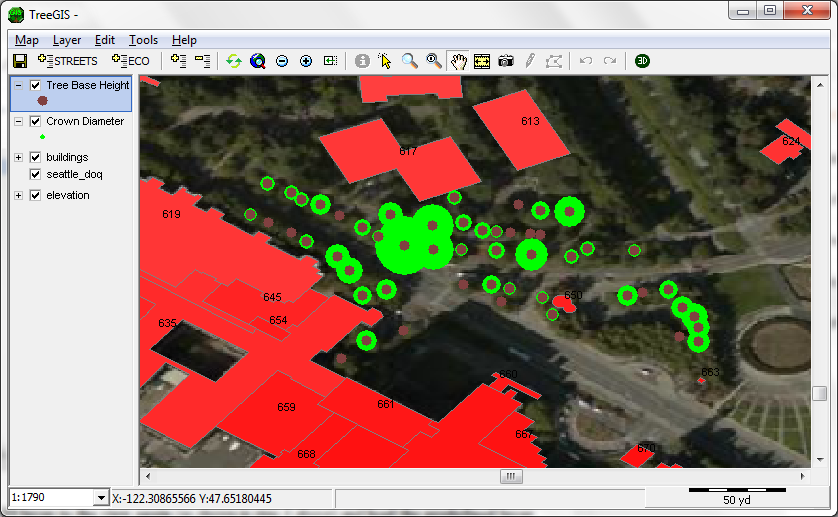
(5) Add predefined layer properties to the ECO layer by selecting
Layer/Load Layer Properties from .ini File and selecting the
CrownDiameter.ini file in the sample data folder to display the unique crown diameter for each tree as shown below.
 |
| Use predefined layer properties to show the crown width of individual trees. |
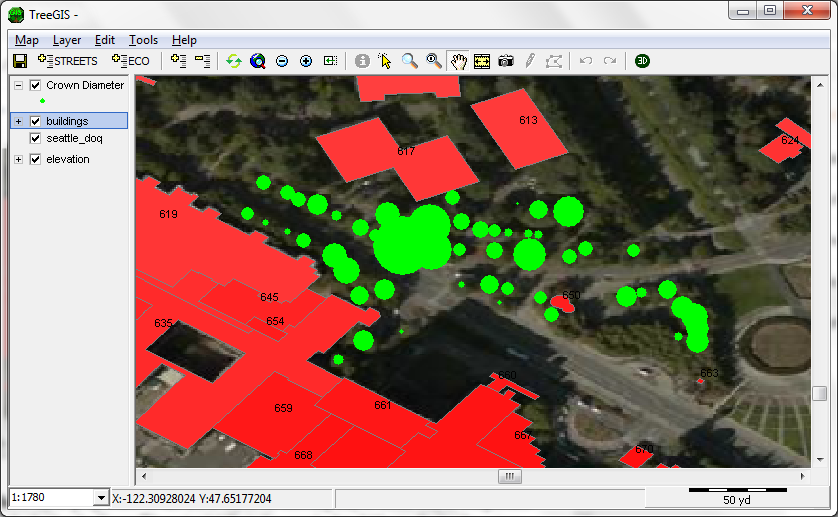
(6) Add the ECO layer to the view again (as shown in step 4 above) and
load the predefined layer properties in the TreeBaseHeight.ini file in the sample data folder (as shown in step 5 above). The view should look like the following screenshot.
 |
| The ECO layer is added again to the view but displayed using different layer properties. |
(7) Click on the 3D button to show the trees in 3D (as shown below). (
Note: tree stem diameter and height are difficult to see at the current angle.)
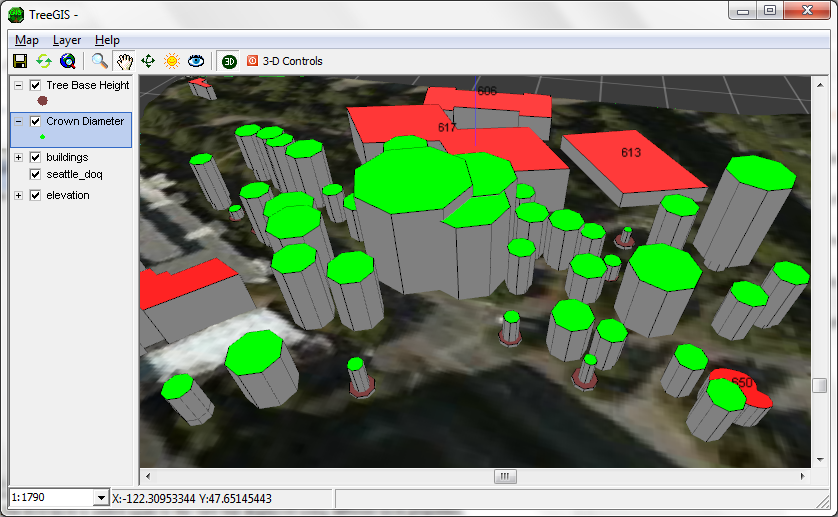 |
| Trees are shown in 3D viewing mode. (Note: tree diameter is not included in the ECO database, so all trees are given the same diameter. However, actual tree diameter could be viewed if it was present in the database.) |
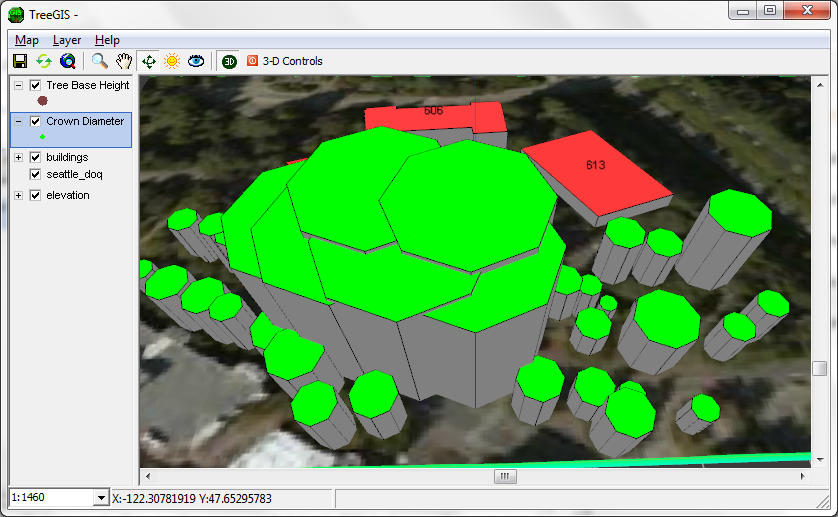
Another 3D viewing option is to
only show the top of the tree canopies (as shown below) rather than the entire volume which makes it easier to see what else is in the 3D scene.
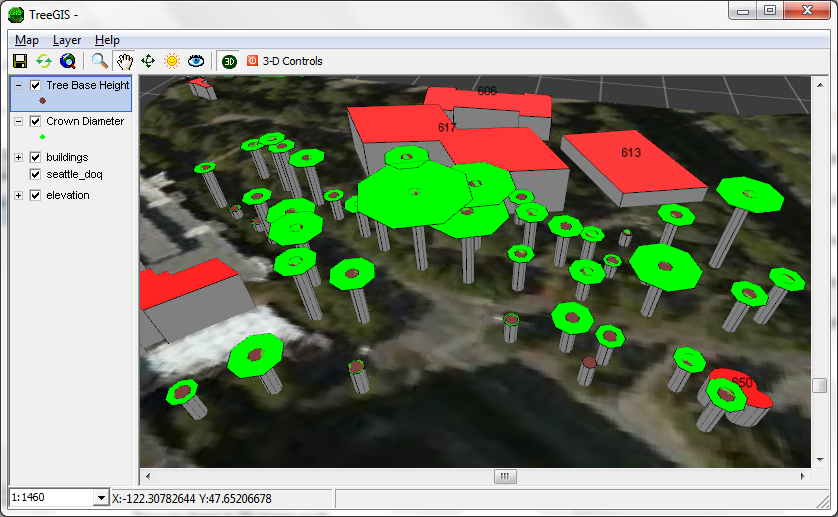 |
| Only the top of the tree canopies are displayed, rather than the entire volume. |
Once the TreeGIS project is set up properly for 3D viewing,
it's easy to simulate tree removal scenarios by 'hiding' trees as shown below.
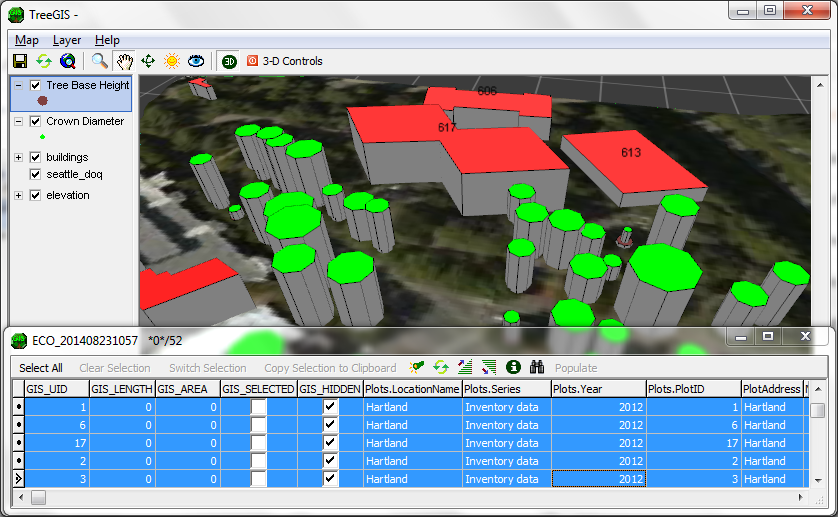 |
| The five largest trees are hidden from view to simulate a tree removal scenario. |
Trees can also be 'grown' to simulate future conditions as shown in the following screenshot.
 |
| Several trees in the center of the view were 'grown' by changing their attributes. |
TreeGIS: The powerful, affordable GIS solution for mapping any tree-based inventory, including i-Tree™
